Full Trust European Hosting

BLOG about Full Trust Hosting and Its Technology - Dedicated to European Windows Hosting Customer

Node.js Hosting Europe - HostForLIFE.eu :: Sending Email Using Node.JS

clock May 22, 2019 07:42 by author Peter

For sending an email using Node.js, we need a node package called nodemailer. Before this, we need to set up the Node environment. To download the latest version of Node, click this link and download.

Once downloaded, install the local environment and make it ready. For confirming the Node installation, open command prompt and type the following command and press enter.
node -v

We will get the currently installed version of Node.js. After completion of all this, follow the below steps.

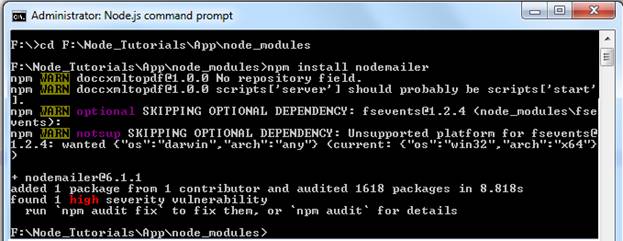
Install the nodemailer package using Node.js command prompt with this command.
npm install nodemailer –s

Once installed, the package.json file will be modified with the dependencies of the nodemailer package.
After installing nodemailer package, import the file to our node.js file which we are using for sending an email. For importing any node package, we need to use -
var nodemailer = require('nodemailer'); 

Here, we have created an instance for nodemailer package as nodemailer. Now, we need to use the createTransport method for assigning the host and credentials for authentication. Find the below one.
var transporter = nodemailer.createTransport({ 
    host: 'mail.yourserver.com', 
    auth: { 
        user: [email protected]', 
        pass: 'password' 
      } 
})

Once we're finished with the above things, we need to construct the list of objects which are required to send an email. Check below.
var mailOptions = { 
    from: emailFrom, 
    to: emailTo, 
    cc: emailCc, 
    bcc: emailBcc, 
    subject: emailSubject, 
    html: emailContent 
  };


Now, we need to use the sendMail method with transporter instance as mentioned below. For this method, we need to pass the mailOptions variable which contains the details of sending an email and we have added the callback function.
transporter.sendMail(mailOptions, function(error, info) { 
        if (error) 
        { 
            res.send([{ 
                result: "failed" 
            }]); 
        } 
        else 
        { 
            res.send([{ 
                result: "success" 
            }]); 
        } 
    }); 


Now, the below part will summarize everything.
const express = require('express'); 
const app = express(); 
var nodemailer = require('nodemailer'); 
 
app.get('/sendmail', (req, res) => { 
  var transporter = nodemailer.createTransport({ 
    service: 'gmail', 
    auth: { 
      user: '[email protected]', 
      pass: 'gmail_account_password' 
    } 
  }); 
  var mailOptions = { 
    from: 'DAEMON <[email protected]>', 
    to: '[email protected]', 
    cc: '[email protected]', 
    bcc: '[email protected]', 
    subject: 'Reg: Send Email using node JS', 
    html: 'Welcome to Node JS' 
  }; 
transporter.sendMail(mailOptions, function (error, info) { 
    if (error) { 
      res.send([{ 
        result: "failed" 
      }]); 
      console.log("failed" + error); 
    } else { 
      res.send([{ 
        result: "success" 
      }]); 
    } 
  }); 
}); 
const port = process.env.PORT || 3000; 
app.listen(port); 
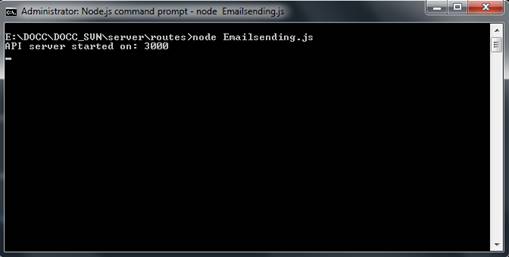
console.log('API server started on: ' + port); 

Just copy this all code and place it into a Node file and name that as Emailsending.js.
Now, open the Node js Command Prompt and execute the Node.js file.
For the execution of node js file, use
node file_name.js


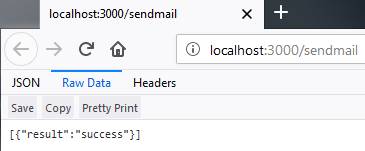
Once the Node.js file is executed, just check this URL http://localhost:3000/sendmail. Here, sendMail is the get method for the above program.

HostForLIFE.eu Node.js Hosting
HostForLIFE.eu is European Windows Hosting Provider which focuses on Windows Platform only. We deliver on-demand hosting solutions including Shared hosting, Reseller Hosting, Cloud Hosting, Dedicated Servers, and IT as a Service for companies of all sizes. We have customers from around the globe, spread across every continent. We serve the hosting needs of the business and professional, government and nonprofit, entertainment and personal use market segments.


European Visual Studio 2017 Hosting - HostForLIFE.eu :: Using C# Regions To Improve Code Readability

clock May 17, 2019 09:44 by author Peter

An instructor I once had made a statement that has echoed in my head for years. When you are a programmer, you have two groups of end users, the people who will actually use the software, AND other programmers who may someday have to modify your code. With that in mind, I have always tried to write my code to be as easily readable to other programmers as possible.

Visual Studio .NET gives us some very handy tools to improve readability in our code. One that I am particularly fond of is the #region directive that allows us to collapse code in a customized manor.

Regions are created in this format,
#region MyRegion

your code here
#EndRegion

Everything that falls within the directives will be collapsible.

The method I've chosen to adapt is to create regions for each different type of element in a class (i.e. constructors, variables, methods, properties, enumerators) so that my code can be easily navigated.

Here is an example,

Doing this will keep your code more organized, which in turn will increase efficiency. And someday down the road when another programmer comes across your source code, they will be very thankful.


Umbraco 8.0.2 Hosting UK - HostForLIFE.eu :: How to Reset Umbraco Password?

clock May 8, 2019 11:13 by author Peter

Every computer user both desktop and computer connected to the network would have to know the username and password. Username is your identity to enter into a network, including ATM networks. While the password is the key to your username can be identified and can enter the network.

Username and password are very useful and should not be underestimated, because if your username and password known to other people, then all the data and systems that you have can be problematic. Therefore username and password is one of the important facilities in the computerized system. Besides passwords should be updated or updated at any time. For the system to which you have remained safe and comfortable.

The requirement to use a password:

  • Use a password that's at least 8 characters mixed with numbers and uppercase and lowercase letters.
  • Do not show while typing passwords on those around you.
  • Always remember your password.

Passwords are the key words that you have to remember, but there are times when you forgot your password. In this article, I will discuss how to reset the password on Umbraco 7 manually via database.You try to log into Umbraco but it turns out your password is incorrect. Not a problem as long as you have access to the database and filesystem. 

The first thing you should do is open SQL Manager later locate the folder umbracoUser. Umbraco user passwords stored in your database Umbraco in the umbracoUser table, in userPassword column.

In the table, look for your account to be reset, and make a note to Id you want to update. The password will be encrypted for security reasons, and the password will be stored as a hash for security. So we can not just simply typing long passwords in plain text and expect to get the results directly. We need to know the hash code for several common passwords.

1
2
userPassword Value :   /7IIcyNxAts3fvQYe2PI3d19cDU=
Password :             password
1
2
userPassword Value :   d9xnUXsUah9gycu7D0TpRYcx19c=
Password :             admin
1
2
userPassword Value :   bnWxWyFdCueCcKrqniYK9iAS+7E=
Password :             default

But Umbraco using hashing simple with just a few lines of code. You can generate your hashed password and put it in the user table Password column in umbracoUser table for your user account.

  1. string password = "mypassword";  
  2. HMACSHA1 hash = new HMACSHA1();  
  3. hash.Key = Encoding.Unicode.GetBytes(password);  
  4. string encodedPassword = Convert.ToBase64String(hash.ComputeHash(Encoding.Unicode.GetBytes(password))); 

You just use the generated hash the password and then update records in the table. After that you can log back into Umbraco with your new password.


HostForLIFE.eu Umbraco Hosting

HostForLIFE.eu revolutionized hosting with Plesk Control Panel, a Web-based interface that provides customers with 24x7 access to their server and site configuration tools. Plesk completes requests in seconds. It is included free with each hosting account. Renowned for its comprehensive functionality - beyond other hosting control panels - and ease of use, Plesk Control Panel is available only to HostForLIFE's customers. They offer a highly redundant, carrier-class architecture, designed around the needs of shared hosting customers.


About HostForLIFE.eu

HostForLIFE.eu is European Windows Hosting Provider which focuses on Windows Platform only. We deliver on-demand hosting solutions including Shared hosting, Reseller Hosting, Cloud Hosting, Dedicated Servers, and IT as a Service for companies of all sizes.

We have offered the latest Windows 2016 Hosting, ASP.NET Core 2.2.1 Hosting, ASP.NET MVC 6 Hosting and SQL 2017 Hosting.


Tag cloud

Sign in