Full Trust European Hosting

BLOG about Full Trust Hosting and Its Technology - Dedicated to European Windows Hosting Customer

Node.js Hosting Europe - HostForLIFE.eu :: How to Create a Node.js Logging System with Express?

clock April 25, 2024 13:50 by author Peter

In contemporary web development, logging plays a crucial role in program monitoring and troubleshooting. Node.js offers a variety of logging tools for monitoring and analyzing application operations because of its event-driven architecture. This article will walk through how to build a logging system for a Node.js application using Winston, a versatile logging package, and Express, a popular web framework.

What is Logging?
The process of keeping track of activities and occurrences inside a software system is called logging. These log entries help with debugging, monitoring, auditing, and security. They include timestamps, severity levels, messages, and contextual data. Logging helps with performance analysis, intrusion detection, compliance adherence, and troubleshooting by capturing important information about system behavior. With their ability to provide insights into application flow, performance bottlenecks, user actions, and security concerns, logs are an indispensable tool for developers, administrators, and security professionals. Logging is essentially a basic procedure used in software development and operations that makes software systems easier to manage, secure, and monitor.

Why we use Logging?

Logging serves several essential purposes in software development:

  • Debugging and Troubleshooting: Logs are an important source of information for troubleshooting and identifying difficulties with a program. To comprehend the execution flow, spot faults, and find the source of problems, developers can go through log messages.
  • Monitoring and Performance Optimization: Developers may keep an eye on an application's performance in real time with the help of logs. Developers can pinpoint performance bottlenecks, maximize resource use, and raise the application's general effectiveness by examining log data.
  • Auditing and Compliance: Keeping track of user actions and system events is facilitated by logging. For compliance with legal standards like GDPR, HIPAA, or PCI DSS, this audit trail is crucial. Logs are useful for monitoring user behavior, spotting illegal access, and guaranteeing the accuracy of data.
  • Security and Intrusion Detection: When it comes to identifying security risks and unauthorized access attempts, logs are essential. Events including unsuccessful login attempts, questionable activity, and possible security breaches are recorded in security logs. Administrators are able to quickly identify and address security incidents by examining security logs.

Steps for Creating a Project
Step 1.  Setting Up the Project
Use my previous article for setting up Node.js, "How to upload file in Node.js" In this article, we mentioned important commands for uploading files in Node.js.

Step 2. Integrating Winston for Logging

Winston is a versatile Node.js logging package that supports many transports, such as file, database, and terminal. Winston will be set up to log messages to both the console and a log file at various levels (info, error, etc.).
// main.js

const winston = require('winston');

// Create a logger instance
const logger = winston.createLogger({
  level: 'info', // Logging level
  format: winston.format.json(), // Log format
  transports: [
    // Log to the console
    new winston.transports.Console(),
    // Log to a file
    new winston.transports.File({ filename: 'logging_file.log' })
  ]
});


Step 3.  Implementing Logging Middleware in Express
We are able to intercept and handle incoming requests thanks to express middleware. A unique middleware function will be developed to log incoming HTTP requests. Request methods, URLs, and other pertinent data will be recorded by this middleware and logged using Winston.
// Middleware to log requests
app.use((req, res, next) => {
  logger.log('info', `${req.method} ${req.url}`);
  next();
});

Step 4.  Creating Routes and Handling Errors
After installing logging middleware, we will create our Express application's routes. To show how to handle requests, we'll construct a simple route for the main page ("/"). Furthermore, error handling middleware will be implemented to log and manage any faults that arise during request processing.
// Route handling
app.get('/', (req, res) => {
  res.send('Hello, world!');
});

// Error handling middleware
app.use((err, req, res, next) => {
  logger.log('error', err.stack);
  res.status(500).send('Something broke!');
});


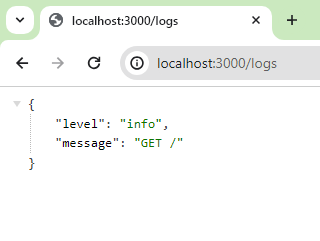
Step 5. Serving Log File via Web Interface
We'll develop an additional route ("/logs") that reads the contents of the log file and sends it to the client in order to give a user-friendly way for log files to be viewed. In order to ensure security and avoid dangerous infinite loops, this route will ignore logging requests so they are not kept in the log file.
// Route to serve log file
app.get('/logs', (req, res) => {
  fs.readFile('combined.log', 'utf8', (err, data) => {
    if (err) {
      logger.log('error', err);
      return res.status(500).send('Error reading log file');
    }
    res.type('text/plain').send(data);
  });
});


Step 6. Running the Application

Finally, let us launch our Express application and verify its operation. To start the HTTP request logging, start the server and visit the home page. You may also view the contents of the log file using the web interface by going to the "/logs" route.
node main.js

Output


AngularJS Hosting Europe - HostForLIFE.eu :: Methods for Data Transfer in Angular

clock April 18, 2024 08:36 by author Peter

As a potent framework for creating dynamic and interactive single-page applications (SPAs), Angular has made a name for itself. An important problem for developers working with Angular apps is effectively and efficiently moving data across components. Fortunately, Angular offers a number of techniques, each designed to fit a particular use case or scenario, to help with this data transmission process. We'll examine the many Angular methods of data transfer across components in this article.

1. Bindings for Input and Output
Angular components can employ input and output bindings to exchange data with one another. While output bindings allow child components to broadcast events back to their parent components, input bindings let a parent component to pass data to its child components.

// Parent Component
import { Component } from '@angular/core';

@Component({
  selector: 'app-parent',
  template: `
    <app-child [inputData]="parentData" (outputEvent)="handleOutput($event)"></app-child>
  `
})
export class ParentComponent {
  parentData = 'Data from parent';

  handleOutput(data: any) {
    // Handle emitted data from child component
  }
}

// Child Component
import { Component, Input, Output, EventEmitter } from '@angular/core';

@Component({
  selector: 'app-child',
  template: `
    <p>{{ inputData }}</p>
    <button (click)="emitData()">Emit Data</button>
  `
})
export class ChildComponent {
  @Input() inputData: any;
  @Output() outputEvent = new EventEmitter<any>();

  emitData() {
    this.outputEvent.emit('Data from child');
  }
}


2. Services

Angular services act as singletons that can be injected into any component throughout the application. They are ideal for sharing data and functionality across multiple components.
// Shared Service
import { Injectable } from '@angular/core';
import { BehaviorSubject } from 'rxjs';

@Injectable({
  providedIn: 'root'
})
export class DataService {
  private dataSubject = new BehaviorSubject<any>(null);
  data$ = this.dataSubject.asObservable();

  setData(data: any) {
    this.dataSubject.next(data);
  }
}

// Components
import { Component } from '@angular/core';
import { DataService } from './data.service';

@Component({
  selector: 'app-sender',
  template: `
    <button (click)="sendData()">Send Data</button>
  `
})
export class SenderComponent {
  constructor(private dataService: DataService) {}

  sendData() {
    this.dataService.setData('Data from sender');
  }
}

@Component({
  selector: 'app-receiver',
  template: `
    <p>{{ receivedData }}</p>
  `
})
export class ReceiverComponent {
  receivedData: any;

  constructor(private dataService: DataService) {
    this.dataService.data$.subscribe(data => {
      this.receivedData = data;
    });
  }
}


3. Route Parameters and Query Parameters
// Routing Module
import { NgModule } from '@angular/core';
import { RouterModule, Routes } from '@angular/router';
import { Component1Component } from './component1.component';
import { Component2Component } from './component2.component';

const routes: Routes = [
  { path: 'component1/:id', component: Component1Component },
  { path: 'component2', component: Component2Component }
];

@NgModule({
  imports: [RouterModule.forRoot(routes)],
  exports: [RouterModule]
})
export class AppRoutingModule { }

// Components
import { Component, OnInit } from '@angular/core';
import { ActivatedRoute } from '@angular/router';

@Component({
  selector: 'app-component1',
  template: `
    <p>{{ id }}</p>
  `
})
export class Component1Component implements OnInit {
  id: string;

  constructor(private route: ActivatedRoute) {}

  ngOnInit() {
    this.route.params.subscribe(params => {
      this.id = params['id'];
    });
  }
}

@Component({
  selector: 'app-component2',
  template: `
    <a [routerLink]="['/component1', '123']">Go to Component 1 with ID</a>
  `
})
export class Component2Component { }


Data communication between components is essential to creating scalable and reliable solutions in Angular apps. Through the utilization of methods like services, routing systems, and input and output bindings, developers may proficiently oversee data flow and communication in their applications. Gaining knowledge of these Angular data transfer methods enables developers to create Angular apps that are more modular, efficient, and manageable.


AngularJS Hosting Europe - HostForLIFE.eu :: Custom Directives in the Angular

clock April 3, 2024 09:51 by author Peter

One of the main components of the Angular framework is Angular directives, which are used to attach to the DOM, change elements, and enhance the functionality and structure of HTML.


Predefined directives with an angle

ngStyle, ngClass, ngIf, ngFor, and ngswitch

Why are the custom directives being created?
When developing real-time applications, it's common to need to preserve consistency and reusability while utilizing the same feature repeatedly.

As an illustration
Only allow numbers in the registration form; any text entered by the user will be blocked by the input field.
Make the special directive.

ng g directive Directive/AollwNumber

AllowNumber.ts

import { Directive, ElementRef, HostListener } from '@angular/core';

@Directive({
  selector: '[appAllowNumber]'
})
export class AllowNumberDirective {

 // Allow numbers.
 private regex: RegExp = new RegExp(/^\d+$/);

 // Allow key codes for special events. Reflect :
 // Backspace, tab, end, home
 private specialKeys: Array<string> = ['Backspace', 'Tab', 'End', 'Home', 'ArrowLeft', 'ArrowRight', 'Delete'];

 constructor(private el: ElementRef) {
 }

 @HostListener('keydown', ['$event'])
 onKeyDown(event: KeyboardEvent) {
    debugger
     const selecetdText = window.getSelection().toString();
     // Allow Backspace, tab, end, and home keys
     if (this.specialKeys.indexOf(event.key) !== -1) {
         return;
     }

     let current: string = this.el.nativeElement.value;

     if(selecetdText != "" && current.indexOf(selecetdText) !== -1){
         current = current.slice(0,current.indexOf(selecetdText));
     }
     // We need this because the current value on the DOM element
     // is not yet updated with the value from this event
     let next: string = current.concat(event.key);

     if (next && !String(next).match(this.regex)) {
         event.preventDefault();
     } else if (event.currentTarget['max'] != "undefined" && event.currentTarget['max'] != "" && event.currentTarget['max'] != null && !(Number(event.currentTarget['max']) >= Number(next))) {
         event.preventDefault();
     }
     if(event.currentTarget['min'] != "undefined" && event.currentTarget['min'] != "" && event.currentTarget['min'] != null && !(Number(event.currentTarget['min']) <= Number(next)) ){
         event.preventDefault();
     }

 }
 /**
  * This is for restrict paste value in input field
  * @param e
  */
 @HostListener('paste', ['$event']) blockPaste(e: KeyboardEvent) {
     e.preventDefault();
 }

}


Register the directive App module
After the creation of the directive, this is required to be registered in the root directive module or app module.

Decore directive in the Input Field


About HostForLIFE.eu

HostForLIFE.eu is European Windows Hosting Provider which focuses on Windows Platform only. We deliver on-demand hosting solutions including Shared hosting, Reseller Hosting, Cloud Hosting, Dedicated Servers, and IT as a Service for companies of all sizes.

We have offered the latest Windows 2016 Hosting, ASP.NET Core 2.2.1 Hosting, ASP.NET MVC 6 Hosting and SQL 2017 Hosting.


Tag cloud

Sign in