This article will discuss Angular routings and the various methods to render different components using routing.

Node Js Angular VS Code
What is Angular?
Popular open-source JavaScript framework for developing web applications is Angular. It was created by Google and is presently maintained by the Google Angular Team. Angular enables developers to create dynamic single-page applications (SPAs) and provides a structured method for constructing complex web applications.
What exactly is Routing?
In web development, routing refers to the process of determining how an application responds to a particular URL or path. It involves mapping URLs to various application components or views and displaying the appropriate content based on the requested URL.
Routing enables users to navigate between various views or pages in a client-side web application, such as a single-page application (SPA) built with Angular, without actually loading a new HTML page from the server. The application instead dynamically modifies the browser's content by loading the required components and data based on the requested route.
Advantages of Routing
Routing in web applications has numerous advantages. Here are several significant benefits of using routing:
- Improved User Experience Routing enables a fluid and interactive user experience by allowing users to navigate between various views or pages within an application without reloading the entire page.
- With routing, only the necessary components and data for the requested route are loaded, which results in quicker page transitions.
- Routing promotes a modular structure for an application by segregating it into distinct views or components associated with specific routes. This facilitates code reuse, separation of concerns, and easier maintenance. Each route can have its own component, making it simpler to administer and independently update distinct sections of the application.
- Conditional Rendering and Dynamic Content: Based on the current route, routing enables conditional rendering of components. This enables you to display or conceal specific application sections based on the user's navigation path.
- Route Parameters and Query Parameters: Passing route parameters and query parameters is supported by routing. You can transmit dynamic values in the URL, such as an ID or a username, and retrieve them in the corresponding component using route parameters. Query parameters enable the URL to receive additional data for filtering, categorizing, and other purposes.
- Route Guards and Security Angular routing includes route guards, which are mechanisms for controlling access to particular routes based on certain conditions. Route guardians can be used for authentication, authorization, and other purposes related to security. They aid in ensuring that users can only access routes or execute actions if they satisfy the required criteria.
- Routing supports nested or subsidiary routes, enabling you to define a hierarchical navigation structure within an application. This is especially useful when dealing with complex applications with multiple navigation levels or sections that must be encapsulated and managed independently.
Routing has a significant impact on enhancing the user experience, enhancing performance, and facilitating modular and maintainable code structures in web applications.
Routing in Angular
In a client-side web application, such as a single-page application (SPA) developed with Angular, routing enables users to navigate between various views without loading a new HTML page. The application instead dynamically modifies the browser's content by loading the required components and data based on the requested route.
Angular routing typically comprises the following components:
- Routes: Routes define the correspondence between the URL path and the components to be rendered. Each route is defined with a corresponding URL path and component that will be displayed when that path is accessed.
- The router interprets the current URL and loads the appropriate components based on the defined routes. It monitors URL modifications and manages navigation within the application.
- The router outlet is a placeholder within the application's template where the current route's content is rendered.
- Links and Navigation for Routers: Links and navigation elements, such as anchor tags (a>) or buttons, are used to initiate navigation to various routes within an application. Angular allows these elements to be decorated with directives such as routerLink to specify the intended route.
Routing example in Angular
Step 1
Install NodeJS.
Step 2
Install Angular CLI using the following command.
npm install -g @angular/cli
Step 3
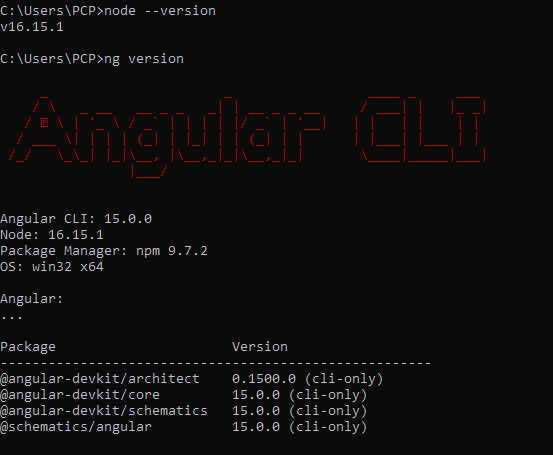
Verify NodeJS and Angular CLI are installed or not using the following commands:
node — version
ng version
Create a new Angular Application.
ng new RoutingDemo
Step 4
Open the Angular application in one of the editors, like VS Code, and install the bootstrap with the help of the following command:
npm install bootstrap
next, add the bootstrap script inside the angular.json file inside the scripts and styles section
"styles": [
"src/styles.css",
"./node_modules/bootstrap/dist/css/bootstrap.min.css"
],
"scripts": [
"./node_modules/bootstrap/dist/js/bootstrap.min.js"
]
Step 5
Open your terminal or command prompt and navigate to your Angular project directory. Run the following commands to generate the components:
ng generate component home
ng generate component about
ng generate component contact
ng generate component feedback
ng generate component product
ng generate component product-offer
ng generate component product-updates
ng generate component rating
Step 6
Routing Configuration:
Open the app-routing.module.ts file in your project and update the route configuration to include the newly created components.
import { NgModule } from '@angular/core';
import { RouterModule, Routes } from '@angular/router';
import { HomeComponent } from './components/home/home.component';
import { ProductComponent } from './components/product/product.component';
import { AboutComponent } from './components/about/about.component';
import { ContactComponent } from './components/contact/contact.component';
import { ProductOfferComponent } from './components/product-offer/product-offer.component';
import { ProductUpdatesComponent } from './components/product-updates/product-updates.component';
import { RatingComponent } from './components/rating/rating.component';
import { FeedbackComponent } from './components/feedback/feedback.component';
const routes: Routes = [
{ path: '', redirectTo: 'home', pathMatch: 'full' }, //default route
{ path: 'home', component: HomeComponent },
{
path: 'product/:id', component: ProductComponent,
children: [
{path: '', redirectTo:'updates', pathMatch:'full'},
{ path: 'offers', component: ProductOfferComponent },
{ path: 'updates', component: ProductUpdatesComponent }
]
},
{ path: 'about', component: AboutComponent,
children: [
{path: 'rating', outlet:'rate', component:RatingComponent},
{path: 'feedback', outlet:'feed', component:FeedbackComponent}
]
},
{ path: 'contact', component: ContactComponent },
{ path: '**', component: HomeComponent }
];
@NgModule({
imports: [RouterModule.forRoot(routes)],
exports: [RouterModule]
})
export class AppRoutingModule { }
This configuration maps the respective paths to their corresponding components.
In Angular, the RouterModule and Routes are key components used for configuring and managing routing in an application.
RouterModule
The RouterModule is an Angular module that provides the necessary directives, services, and functionality for implementing routing in an application.
Routes
Routes is an array that defines the routes and their configurations within the application. Each route object within the Routes array specifies the URL path and the corresponding component to be rendered when that path is accessed.
Line No. 13:
To define a default route in Angular, you can use an empty path ‘ ’ as the route path in the Routes array configuration. When the empty path is accessed, Angular will render the component associated with that route.
To redirect to a different route when the default route is accessed, you can use the redirectTo property with a target route path. Additionally, the pathMatch property can be used to define the matching strategy for the route.
Line 15 to 22:
To create a route with an id parameter for displaying product details, you can modify the routing configuration in Angular as follows:
path: 'product/:id', component: ProductComponent
In this example, we’ve added a route with the path ‘product/:id’ to represent the product details page. The :id part indicates a dynamic parameter that can be accessed in the ProductComponent.
import { Component, OnInit } from '@angular/core';
import { ActivatedRoute } from '@angular/router';
import { ProductsService } from '../../services/products.service';
@Component({
selector: 'app-products',
templateUrl: './product.component.html',
styleUrls: ['./product.component.css']
})
export class ProductComponent implements OnInit {
productDetail? : any;
constructor(private route : ActivatedRoute,private productService : ProductsService){}
ngOnInit(): void {
let productId = this.route.snapshot.params['id'];
this.getProductDetailById(productId)
}
getProductDetailById(id: number){
this.productService.getProductDetailById(id).subscribe(res => {
this.productDetail = res
console.log(res)
})
}
}
In this code, we inject the ActivatedRoute service to access the current route’s parameters. In the ngOnInit() lifecycle hook, we retrieve the id parameter using this.route.snapshot.params[‘id’] and assign it to the productId property for later use in the component’s template.
Finally, you can navigate to the product details page by providing an id value in the URL. For example, if you have a product with an id of 123, you can navigate to http://localhost:4200/product/123 to see the product details.
The ProductComponent will be rendered with the corresponding id parameter retrieved from the URL, and you can use the productId property to display the relevant product information in the template.
To create child components, ProductOfferComponent and ProductUpdatesComponent, nested under the ProductComponent, you can modify the routing configuration in Angular as follows:
Update the Routes array in your routing module (e.g., app-routing.module.ts) to include the child routes under the ProductComponent:
{
path: 'product/:id', component: ProductComponent,
children: [
{path: '', redirectTo:'updates', pathMatch:'full'},
{ path: 'offers', component: ProductOfferComponent },
{ path: 'updates', component: ProductUpdatesComponent }
]
}
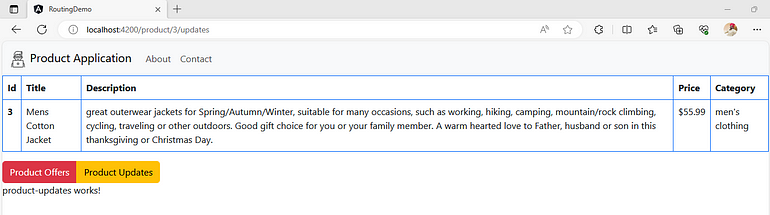
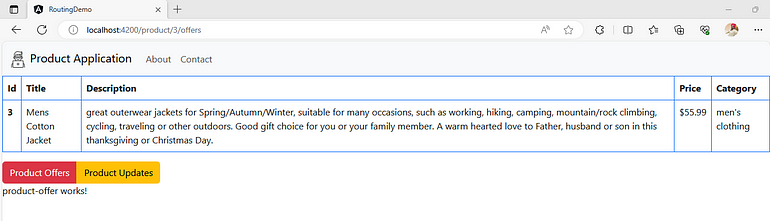
In this updated example, we’ve added child routes to the ProductComponent. The empty path ‘ ’within the children routes corresponds to the ProductComponent as the default component to be rendered when accessing /product. The offers and updates paths map to the ProductOfferComponent and ProductUpdatesComponent, respectively.
Lines 23 to 28:
To create child components RatingComponent and FeedbackComponent nested under the AboutComponent, with named outlets for rating and feedback, you can modify the routing configuration in Angular as follows:
Update the Routes array in your routing module (e.g., app-routing.module.ts) to include the child routes under the AboutComponent with named outlets:
{
path: 'about', component: AboutComponent,
children: [
{path: 'rating', outlet:'rate', component:RatingComponent},
{path: 'feedback', outlet:'feed', component:FeedbackComponent}
]
}
In this updated example, we’ve added child routes to the AboutComponent and specified the named outlet's rate and feed for the RatingComponent and FeedbackComponent, respectively.
Implement the AboutComponent template (about.component.html) to include the named outlets’ placeholders. For example:
<p>Lorem ipsum dolor sit, amet consectetur adipisicing elit. Tenetur magni saepe sint, vel eaque veniam recusandae laboriosam numquam necessitatibus? Laborum mollitia excepturi qui. Modi corporis quasi ab minima eligendi numquam!</p>
<div class="row">
<div class="col-md-6">
<router-outlet name="rate"></router-outlet>
</div>
<div class="col-md-6">
<router-outlet name="feed"></router-outlet>
</div>
</div>
In this template, we’ve added two <router-outlet> placeholders with the name attribute set to ‘rate’ and ‘feed’. These placeholders will be used to render the RatingComponent and FeedbackComponent within the AboutComponent template.
Update the component files for RatingComponent and FeedbackComponent as needed.
Finally, you can navigate to the About and Child components using the named outlets. For example, to access the rating component, navigate to http://localhost:4200/about/(rate:rating//feed:feedback).
I have created an outer link, as I have shown below in the app component. But You can create a URL as per your requirement, and for that, you need appropriate router links with outlets.
<a class="nav-link" [routerLink]="['/about',{
outlets:{
'rate': ['rating'],
'feed': ['feedback']
}
}]">About</a>
Line No. 30:
In Angular, the double asterisk (**) route, also known as the wildcard route or catch-all route, is used to handle routes that do not match any predefined routes. It acts as a fallback route to handle unknown or invalid URLs within your application.
To define a wildcard route, you can add a route with the path: ‘**’ configuration at the end of your routes array. This route will be matched when no other route matches the requested URL.
{ path: '**', component: HomeComponent }
Step 7
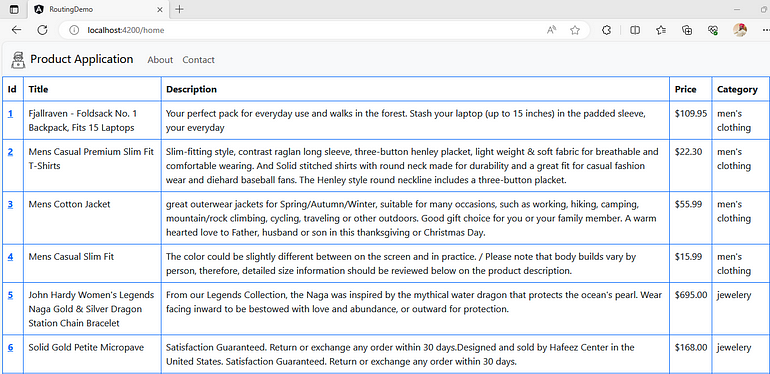
Mention the router outlet in the app component view to conditionally render different components based on navigation.
<nav class="navbar navbar-expand-lg bg-body-tertiary">
<div class="container-fluid">
<a class="navbar-brand" href="#">
<img src="../assets/logo/coder.png" class="navlogo"/> Product Application
</a>
<button class="navbar-toggler" type="button" data-bs-toggle="collapse" data-bs-target="#navbarNavAltMarkup" aria-controls="navbarNavAltMarkup" aria-expanded="false" aria-label="Toggle navigation">
<span class="navbar-toggler-icon"></span>
</button>
<div class="collapse navbar-collapse" id="navbarNavAltMarkup">
<div class="navbar-nav">
<a class="nav-link" [routerLink]="['/about',{
outlets:{
'rate': ['rating'],
'feed': ['feedback']
}
}]">About</a>
<a class="nav-link" routerLink="/contact">Contact</a>
</div>
</div>
</div>
</nav>
<router-outlet></router-outlet>

So, this is all about routing in Angular.