In this post, I will tell you how to create costum section in Umbraco 7. Every section in Umbraco is called an application, so sections and applications is basically the same thing.The first thing you’ll need to do is to create the application. In this examples I will not fiddle with the xml-files or the database. So, I’ll use class annotations to create my section.

The first step that you’ll need to do is to create a class that implements the IApplication-interface so that Umbraco will initialize this class on start up.
[Application("CustomSection", "CustomSection","icon-car", 15)]
public class CustomSectionApplication : IApplication {}
This is not something new for Version 7, The "Application"attribute basically tells Umbraco to create a new application:
Name: CustomSection
Alias: CustomSection
Icon: icon-car (the css class for the icon that will be displayed in the left side bar of the backoffice)
Sort order: 15
Next, Umbraco runs and will add an XML-element to the /config/applications.config-file that will add your new section/application to the Umbraco backoffice.
Creating The Tree
Umbraco will not care about your new application before creating the tree. An application without a tree is not worth anything. Let's start with creating a new class that inherits from Umbraco.Web.Trees.TreeController, make sure to suffix the class name with “Controller” ie. CustomSectionTreeController.
public class CustomSectionTreeController : TreeController
{
}
Now we need to give Umbraco some extra information about our tree. Let's add two attributes on the class, the Tree and the PluginController-attributes.
[PluginController("CustomSection")]
[Umbraco.Web.Trees.Tree("CustomSection", "CustomSectionTree", "My custom section", iconClosed: "icon-doc")]
public class CustomSectionTreeController : TreeController
{
}
PluginController
This attribute tells Umbraco that this class is part of a plugin, and it also tells Umbraco the name of that plugin. This will make Umbraco look for views inside the /app_plugin/{NameOfApplication}/-folder and not in the folder of the core-views which is the default.
Tree
This attribute is “older” and has been around since somewhere around 4.7 I think. It tells Umbraco that this is a tree-class and Umbraco will add this to the /config/trees.config-file. In V7 this attribute is mandatory for a tree that inherits from the TreeController-class as some underlying logic is looking at the attribute values to determine the name of the tree.
The properties are:
Application: CustomSection (must match the name of the application we added before)
Alias: CustomSectionTree (the name/alias of the tree)
Title: The title of the tree (used as the name of the root node)
Icon: The icon (or class) used as the tree icon.
Alright. Almost there. Now we need to add some code to show items in the tree.
[PluginController("CustomSection")]
[Umbraco.Web.Trees.Tree("CustomSection", "CustomSectionTree","My custom section", iconClosed: "icon-doc")]
public class CustomSectionTreeController : TreeController
{
protected override TreeNodeCollection GetTreeNodes(string id, FormDataCollection queryStrings)
{
var nodes = new TreeNodeCollection();
var item = this.CreateTreeNode("dashboard", id, queryStrings, "My item", "icon-truck", true);
nodes.Add(item);
return nodes;
}
protected override MenuItemCollection GetMenuForNode(string id, FormDataCollection queryStrings)
{
var menu = new MenuItemCollection();
menu.DefaultMenuAlias = ActionNew.Instance.Alias;
menu.Items.Add<ActionNew>("Create");
return menu;
}
}
This will give us something like this:
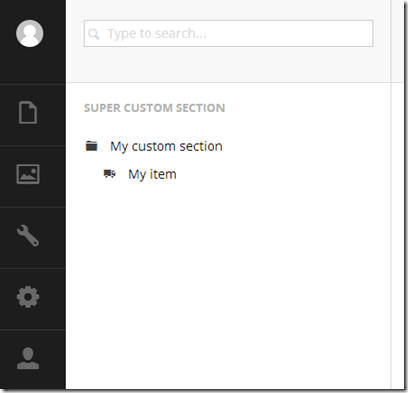
This code has two methods that are the least we need to do to create a new section.
GetTreeNodes (TreeNodeCollection)
This returns a collection of tree items, in our case we just return one item but we could of curse add more items to the collection. We use the CreateTreeNode-method from the base class to create a new node called “My item” with the id “dashboard”. Umbraco will append the id of the node to the URL later on so that we can handle the routing from our AngularJS-controllers.
GetMenuForNode (MenuItemCollection)
This method handles the “right click alternatives”. The “DefaultMenuAlias” configures which action that should be fired when we click the “touch dots”.
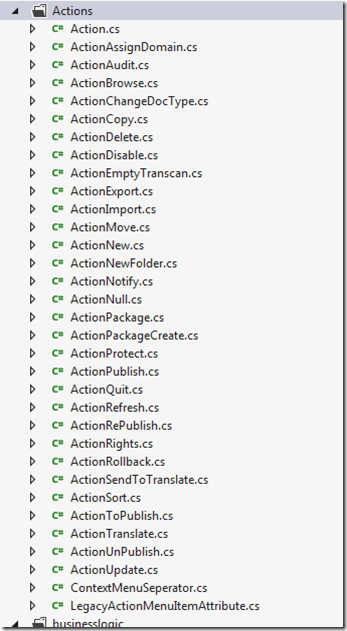
There's a lot of actions that you can use and you can also build your own ones:
Displaying Your New Section
To display your new section you need to give the current user access to it. Go to the users-section and open the edit-view for the current logged on user. In the bottom, check the checkbox for [CustomSection] and hit save. Now you’ll probably need to refresh the page using F5 to show the new section in the left side bar.
Umbraco 7 with Free ASP.NET Hosting
Try our Umbraco 7.2.2 with Free ASP.NET Hosting today and your account will be setup soon! You can also take advantage of our Windows & ASP.NET Hosting support with Unlimited Domain, Unlimited Bandwidth, Unlimited Disk Space, etc.
