Full Trust European Hosting

BLOG about Full Trust Hosting and Its Technology - Dedicated to European Windows Hosting Customer

AngularJS Hosting Europe - HostForLIFE.eu :: Knowing the Hooks of the Angular Lifecycle

clock February 11, 2025 07:30 by author Peter

Components in Angular traverse through several phases, from creation to decomposition. The angular lifespan is the aggregate term for these phases. Knowing how to use Angular's lifecycle hooks enables developers to conduct initialization, cleanup, and other essential tasks at strategic points in a component's lifespan. An extensive examination of each of these lifecycle hooks and their proper application is given in this article.

Angular Lifecycle Hooks
Here is a list of the primary lifecycle hooks in Angular.

  • ngOnChanges
  • ngOnInit
  • ngDoCheck
  • ngAfterContentInit
  • ngAfterContentChecked
  • ngAfterViewInit
  • ngAfterViewChecked
  • ngOnDestroy


Let's explore each of these hooks in detail.

1. ngOnChanges
When it’s called: This hook is called whenever an input property bound to a component changes. It’s called before ngOnInit and whenever the input properties are updated.
Use case: Use ngOnChanges to act on changes to input properties from the parent component.

Example
import { Component, Input, OnChanges, SimpleChanges } from '@angular/core';
@Component({
selector: 'app-child',
template: '<p>{{data}}</p>',
})
export class ChildComponent implements OnChanges {
@Input() data: string;
ngOnChanges(changes: SimpleChanges) {
console.log('ngOnChanges called', changes);
}
}


2. ngOnInit
When it’s called: This hook is called once, after the first ngOnChanges. It’s typically used for component initialization.
Use case: Use ngOnInit to perform component initialization, like fetching data.

Example
import { Component, OnInit } from '@angular/core';
@Component({
selector: 'app-example',
template: '<p>Example works!</p>',
})
export class ExampleComponent implements OnInit {
ngOnInit() {
console.log('ngOnInit called');
}
}


3. ngDoCheck
When it’s called: This hook is called during every change detection run. It’s useful for custom change detection.
Use case: Use ngDoCheck to implement custom change detection logic.

Example
import { Component, DoCheck } from '@angular/core';
@Component({
selector: 'app-check',
template: '<p>Check works!</p>',
})
export class CheckComponent implements DoCheck {
ngDoCheck() {
console.log('ngDoCheck called');
}
}


4. ngAfterContentInit
When it’s called: This hook is called after Angular projects external content into the component’s view (ng-content).
Use case: Use ngAfterContentInit to respond to content projection into the component.

Example
import { Component, AfterContentInit } from '@angular/core';
@Component({
selector: 'app-content',
template: '<ng-content></ng-content>',
})
export class ContentComponent implements AfterContentInit {
ngAfterContentInit() {
console.log('ngAfterContentInit called');
}
}


5. ngAfterContentChecked
When it’s called: This hook is called after every check of the component’s projected content.
Use case: Use ngAfterContentChecked to act after the content is checked.

Example
import { Component, AfterContentChecked } from '@angular/core';
@Component({
selector: 'app-content-check',
template: '<ng-content></ng-content>',
})
export class ContentCheckComponent implements AfterContentChecked {
ngAfterContentChecked() {
console.log('ngAfterContentChecked called');
}
}


6. ngAfterViewInit
When it’s called: This hook is called after Angular initializes the component’s views and child views.
Use case: Use ngAfterViewInit to perform actions after the component’s view is initialized.

Example
import { Component, AfterViewInit } from '@angular/core';
@Component({
selector: 'app-view-init',
template: '<p>View Init works!</p>',
})
export class ViewInitComponent implements AfterViewInit {
ngAfterViewInit() {
console.log('ngAfterViewInit called');
}
}


7. ngAfterViewChecked
When it’s called: This hook is called after every check of the component’s view.
Use case: Use ngAfterViewChecked to act after the component’s view is checked.

Example
import { Component, AfterViewChecked } from '@angular/core';
@Component({
selector: 'app-view-check',
template: '<p>View Check works!</p>',
})
export class ViewCheckComponent implements AfterViewChecked {
ngAfterViewChecked() {
console.log('ngAfterViewChecked called');
}
}


8. ngOnDestroy
When it’s called: This hook is called just before Angular destroys the component.
Use case: Use ngOnDestroy for cleanup, like unsubscribing from observables and detaching event handlers.

Example
import { Component, OnDestroy } from '@angular/core';
@Component({
selector: 'app-destroy',
template: '<p>Destroy works!</p>',
})
export class DestroyComponent implements OnDestroy {
ngOnDestroy() {
console.log('ngOnDestroy called');
}
}

Lifecycle Sequence
Understanding the order of these hooks is crucial for correctly implementing logic that depends on the component's lifecycle stages.

  • ngOnChanges
  • ngOnInit
  • ngDoCheck
  • ngAfterContentInit
  • ngAfterContentChecked
  • ngAfterViewInit
  • ngAfterViewChecked
  • ngOnDestroy


Practical Use Cases

  • ngOnInit: Ideal for initialization tasks like fetching data from a service.
  • ngOnChanges: Useful for reacting to changes in input properties.
  • ngOnDestroy: Perfect for cleaning up resources, like unsubscribing from observables.
  • ngAfterViewInit: Great for manipulating the DOM after the view is initialized.

Conclusion
Mastering Angular lifecycle hooks is essential for building robust and maintainable Angular applications. By understanding when and how to use each hook, developers can ensure their components are properly initialized, updated, and cleaned up. This not only leads to better performance but also improves code organization and readability.


Node.js Hosting Europe - HostForLIFE.eu :: Installing NVS on Windows Machine

clock February 4, 2025 07:17 by author Peter

Node Version Switcher, or NVS for short, is a cross-platform utility that may be used on Windows, Linux, and Mac workstations to manage several node versions on a single computer.

This program installs the various node versions in the Windows user profile folder without requiring administrator privileges on your workstation. Put otherwise, it won't interfere with the C:\Program Files or C:\System32 files.

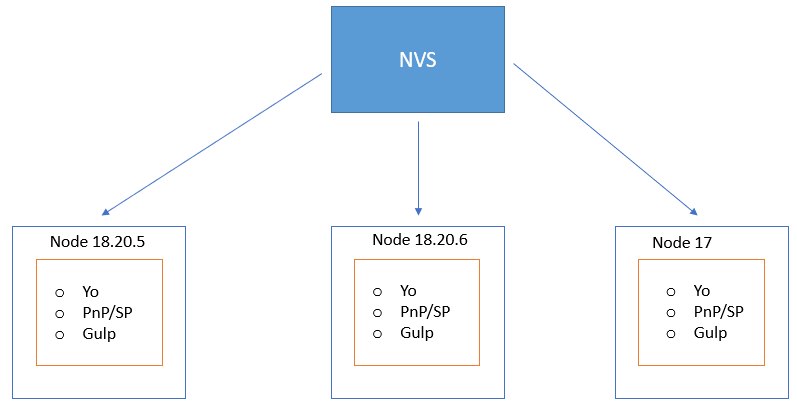
Just like NVM (Node Version Manger)This tool manages all legacy and newer node versions independently and manages the runtime for you on the fly. As you see in the above screenshot, NVS can maintain multiple versions of node in same environment. Each version of the node can have its own tools and runtime.

The node is required for building SPFx (SharePoint Framework) solutions and building SPA (Single Page Applications) and many more.

Steps

Please follow the below steps to set up and configure NVS on windows workstation. Please note that all the steps are performed against windows 11 OS workstation
Step 1. Let us check if the workstation has NVS (Node Version Switcher) already installed.

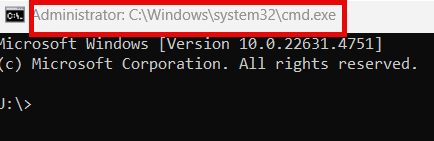
Step 2. Let us try installing NVS on windows machine. In Windows 11, winget is already installed as part of OS and MSFT recommends using winget to install and maintain the software from Github repository. At first it is required to open the command prompt as administrator.

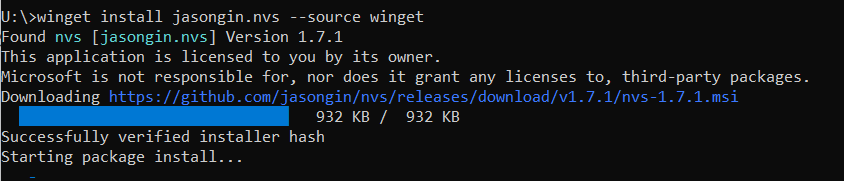
Step 3. in the CMD window, try running the below command to install the NVS. winget install jasongin.nvs –source winget

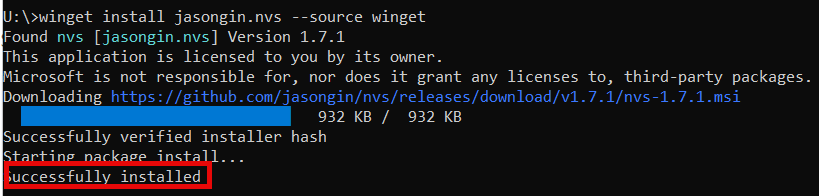
Step 4. Wait for the operation to complete. At the end you should be getting the message ‘Successfully installed’


Step 5. Close the command window. Open the command window again in ‘Administrator Mode’. This is required. Once opened type in ‘nvs’ in the command window. This time if you can see the nvs version numbers you are good and proceed to step 8. Else if you are getting the ‘Self signed certificate issue’ as per below screen capture then proceed to step 6.

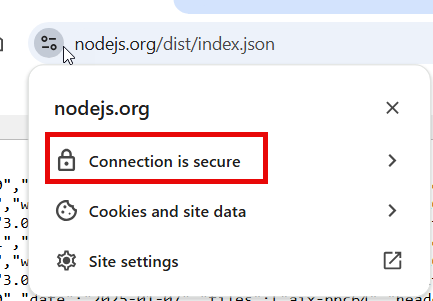
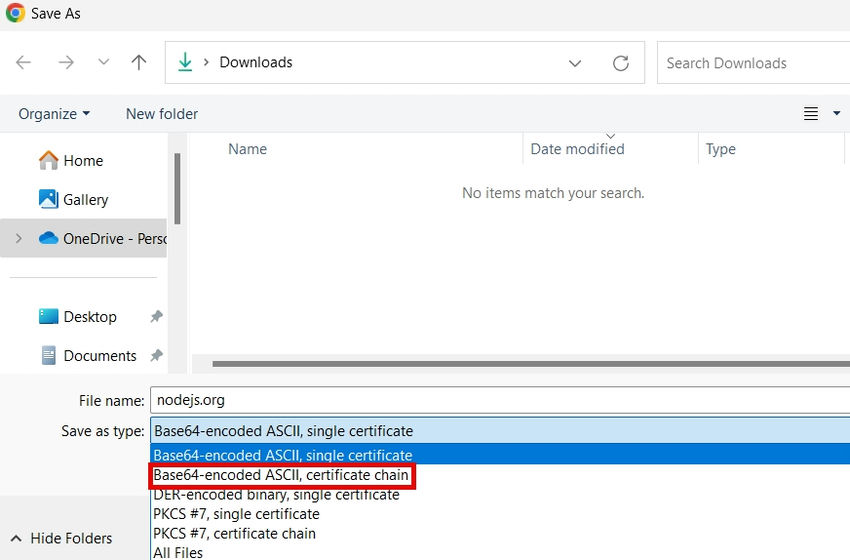
Step 6. Copy the URL https://nodejs.org/dist/index.json in the chrome browser and download the certificate. Make sure you download file contains certificate chain. Click on the certificate information in browser.

Click on lock that says, ‘Connection is secure’.

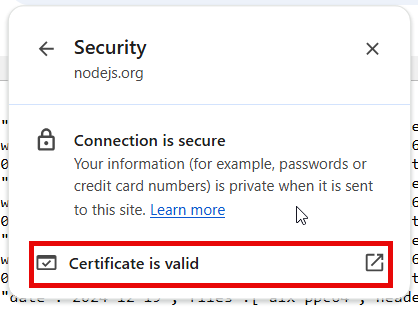
Click on ‘Certificate is valid’

Click on the ‘Details’ tab.

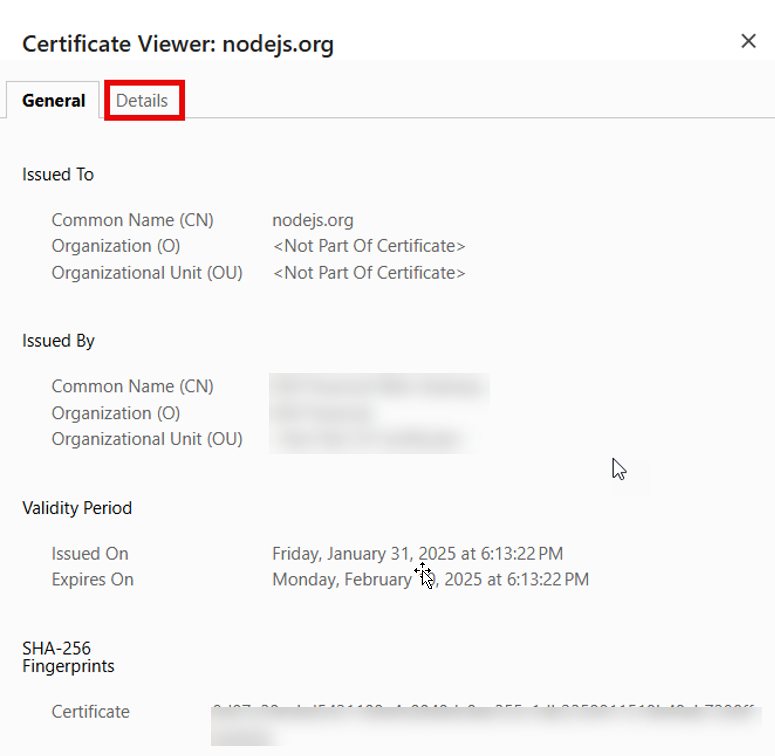
Click on ‘Export Certificate’.

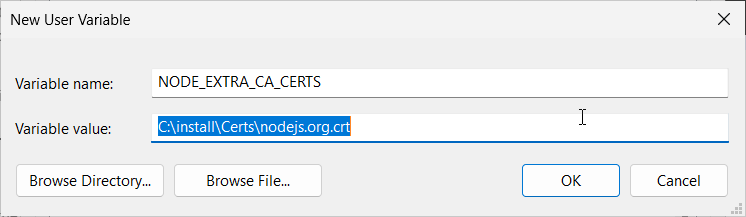
Step 7. Set up the environment variable for your profile under windows environment variables. Set the file for the environment variable to the certificate that you just downloaded.

Step 8. Open the command prompt as administrator and then type nvs and look for the below output.

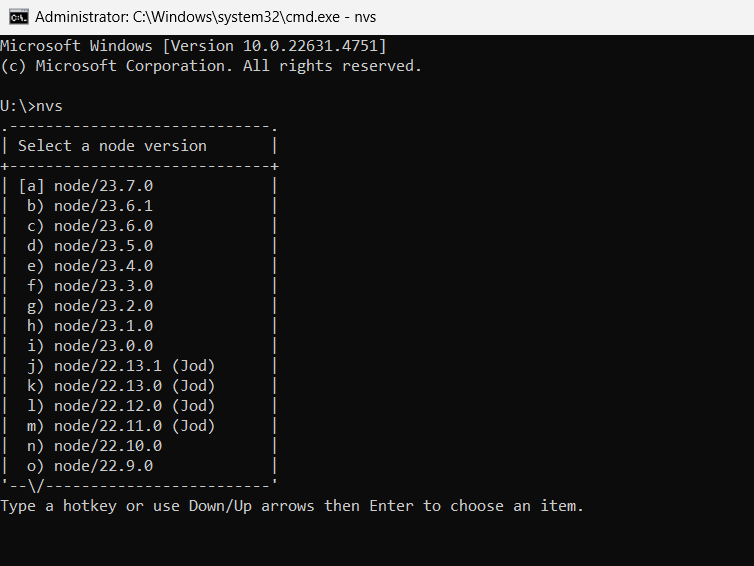
Step 9. If you do not have any version installed, you will be asked to select the node versions from the available binaries. In this case I have chosen to install the version 18.20.6 by using the below command.

nvs add 10.20.6

Step 10. Once the installation starts you will be getting below message.

After couple of minutes, you should get a message that the specified node version is added.

Step 11. clear the screen and type I nvs, you should get the versions now. Select the required version.


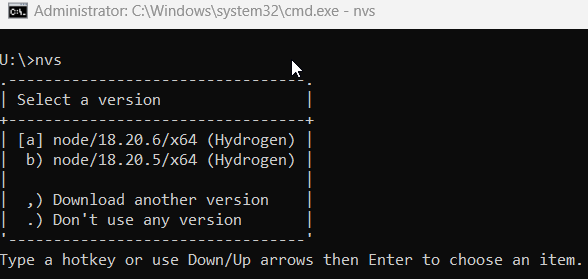
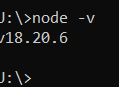
Step 12: I have type in (a). you can select the one that is required for your needs. Once selected you can check the version by using the below command.

node –v

Conclusion
Thus, in this article, you have seen how to install NVS a cross-platform tool to manage multiple node versions efficiently, in windows workstation.

HostForLIFE.eu Node.js Hosting
HostForLIFE.eu is European Windows Hosting Provider which focuses on Windows Platform only. We deliver on-demand hosting solutions including Shared hosting, Reseller Hosting, Cloud Hosting, Dedicated Servers, and IT as a Service for companies of all sizes. We have customers from around the globe, spread across every continent. We serve the hosting needs of the business and professional, government and nonprofit, entertainment and personal use market segments.


About HostForLIFE.eu

HostForLIFE.eu is European Windows Hosting Provider which focuses on Windows Platform only. We deliver on-demand hosting solutions including Shared hosting, Reseller Hosting, Cloud Hosting, Dedicated Servers, and IT as a Service for companies of all sizes.

We have offered the latest Windows 2016 Hosting, ASP.NET Core 2.2.1 Hosting, ASP.NET MVC 6 Hosting and SQL 2017 Hosting.


Tag cloud

Sign in