This post will demonstrate how you use AngularJS and Web API to create a custom deferred grid in MVC. Using web API and AngularJS $http services, we will retrieve the data from the database and create a unique user interface for the grid. When working with a Web API, we typically utilize the ADO.NET Entity data model as the model class, correct?
Here, we will retrieve the data from our database using our standard SQLDataAdapter, SQLConnection, and stored procedure in place of an entity data model. We use Virtual Repeat in AngularJS for loading the data in UI, so that the data will be loaded whenever there is a user action that is scrolling (Virtual Scrolling). So that in the view port we will load only few items first. Now shall we go and see this in detail? I hope you will like this.

Background
We have so many plugins available to show the data in a grid format, don't we? if you want to know few of them, you can find them here. Now what if you need to show the data in a grid format without using any additional plugins? What if you need to load the data to that grid dynamically, that is whenever user scrolls the grid? If you could not find the answer for these questions, here in this post I am going to share an option. I hope you will enjoy reading.
Create a MVC application
Click File, New, Project and then select MVC application. Before going to start the coding part, make sure that AngularJS is installed. You can see all the items mentioned above from NuGet. Right click on your project name and select Manage NuGet packages.
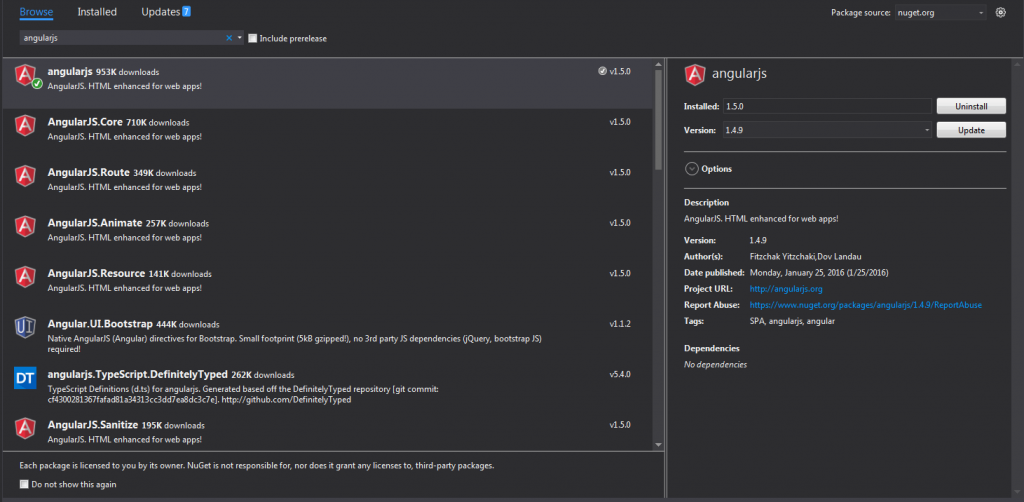
AngularJS NuGet Package Visual Studio
Once you have installed, please make sure that all the items are loaded in your scripts folder.
Using the code
I hope everything is set now, then it is time to start our coding. First we will create a controller action and a view. Below is the code snippet of our controller.
using System;
using System.Collections.Generic;
using System.Linq;
using System.Web;
using System.Web.Mvc;
namespace Custom_Deffered_Grid_Using_MVC_Web_API_And_Angular_JS.Controllers
{
public class DefaultController: Controller
{
// GET: Default
public ActionResult Index()
{
return View();
}
}
}
Here Default/em> is my controller name. Now create a view for this action, and load the needed references.
@{
ViewBag.Title = "Index";
}
<h2>Index</h2>
<link href="~/Content/angular-material.css" rel="stylesheet" />
<script src="~/scripts/angular.min.js"></script>
<script src="~/scripts/angular-route.min.js"></script>
<script src="~/scripts/angular-aria.min.js"></script>
<script src="~/scripts/angular-animate.min.js"></script>
<script src="~/scripts/angular-messages.min.js"></script>
<script src="~/scripts/angular-material.js"></script>
<script src="~/scripts/svg-assets-cache.js"></script>
<script src="~/scripts/Default/Default.js"></script>
You can get these files from the source code attached with this article. And the file Default.js is the additional file where we are requested to do our additional scripts. So far the basic implementation of our view is done. Now we will create a Web API and additional model class to fetch the data from the database. Are you ready?
Below is my Web API controller.
using System;
using System.Collections.Generic;
using System.Linq;
using System.Net;
using System.Net.Http;
using System.Web.Http;
using Custom_Deffered_Grid_Using_MVC_Web_API_And_Angular_JS.Models;
namespace Custom_Deffered_Grid_Using_MVC_Web_API_And_Angular_JS.Controllers
{
public class DataAPIController : ApiController
{
DataModel dm = new DataModel();
public string getData(int id)
{
var d = dm.fetchData(id);
return d;
}
}
}
Have you noticed that I have included using Custom_Deffered_Grid_Using_MVC_Web_API_And_Angular_JS.Models; in the section? This is to ensure that we can use the model classes whatever we have created so far. In this case DataModel is our model class and we are creating an instance for the same.
DataModel dm = new DataModel();
The controller action getData accepting the parameter id, right? This is actually the page offset value which we are passing from the client side. Now we will create our model class, you can find the code snippets below for that.
using System;
using System.Collections.Generic;
using System.Linq;
using System.Web;
using System.Data;
using System.Data.Sql;
using System.Data.SqlClient;
using System.Configuration;
namespace Custom_Deffered_Grid_Using_MVC_Web_API_And_Angular_JS.Models
{
public class DataModel
{
public string fetchData(int pageOffset)
{
string connection = ConfigurationManager.ConnectionStrings["TrialsDBEntities"].ConnectionString;
using (SqlConnection cn = new SqlConnection(connection))
{
SqlCommand cmd = new SqlCommand("usp_Get_SalesOrderDetailPage", cn);
cmd.Parameters.Add("@pageoffset", SqlDbType.Int).Value = pageOffset;
cmd.CommandType = CommandType.StoredProcedure;
try
{
DataTable dt = new DataTable();
SqlDataAdapter da = new SqlDataAdapter(cmd);
cn.Open();
da.Fill(dt);
return GetJson(dt);
}
catch (Exception)
{
throw;
}
}
}
}
}
As I said before, instead of using an entity model we use our normal sql connections and sql data adapter to load the data. Before going to use this function, please make sure that you have added the below references.
using System.Data;
using System.Data.Sql;
using System.Data.SqlClient;
using System.Configuration;
Now coming back to the fetchData function, we use the connection string TrialsDBEntities from the web config file. So it is mandatory that you must have a connection string with that name in your web config file. Once that is done, we call the stored procedure usp_Get_SalesOrderDetailPage and fill the data using SqlDataAdapter.
Another thing to be notified here is we are passing that DataTable to a function called GetJson. So you must have the definition for that too.
public string GetJson(DataTable dt)
{
try
{
if (dt == null)
{
throw new ArgumentNullException("dt");
}
System.Web.Script.Serialization.JavaScriptSerializer serializer = new System.Web.Script.Serialization.JavaScriptSerializer();
List<Dictionary<string, object>> rows = new List<Dictionary<string, object>>();
Dictionary<string, object> row = null;
foreach (DataRow dr in dt.Rows)
{
row = new Dictionary<string, object>();
foreach (DataColumn col in dt.Columns)
{
row.Add(col.ColumnName.Trim(), dr[col]);
}
rows.Add(row);
}
return serializer.Serialize(rows);
}
catch (Exception)
{
throw;
}
}
What this function does is, it converts the data table to a JSON format. So far, the coding related to Web API is done, now it is time to create a database, table, and a stored procedure.
Create a database
The following query can be used to create a database in your SQL Server.
USE [master]
GO
/****** Object: Database [TrialsDB] Script Date: 25-Feb-16 12:34:32 PM ******/
CREATE DATABASE [TrialsDB]
CONTAINMENT = NONE
ON PRIMARY
( NAME = N'TrialsDB', FILENAME = N'C:\Program Files\Microsoft SQL Server\MSSQL11.MSSQLSERVER\MSSQL\DATA\TrialsDB.mdf' , SIZE = 3072KB , MAXSIZE = UNLIMITED, FILEGROWTH = 1024KB )
LOG ON
( NAME = N'TrialsDB_log', FILENAME = N'C:\Program Files\Microsoft SQL Server\MSSQL11.MSSQLSERVER\MSSQL\DATA\TrialsDB_log.ldf' , SIZE = 1024KB , MAXSIZE = 2048GB , FILEGROWTH = 10%)
GO
ALTER DATABASE [TrialsDB] SET COMPATIBILITY_LEVEL = 110
GO
IF (1 = FULLTEXTSERVICEPROPERTY('IsFullTextInstalled'))
begin
EXEC [TrialsDB].[dbo].[sp_fulltext_database] @action = 'enable'
end
GO
ALTER DATABASE [TrialsDB] SET ANSI_NULL_DEFAULT OFF
GO
ALTER DATABASE [TrialsDB] SET ANSI_NULLS OFF
GO
ALTER DATABASE [TrialsDB] SET ANSI_PADDING OFF
GO
ALTER DATABASE [TrialsDB] SET ANSI_WARNINGS OFF
GO
ALTER DATABASE [TrialsDB] SET ARITHABORT OFF
GO
ALTER DATABASE [TrialsDB] SET AUTO_CLOSE OFF
GO
ALTER DATABASE [TrialsDB] SET AUTO_CREATE_STATISTICS ON
GO
ALTER DATABASE [TrialsDB] SET AUTO_SHRINK OFF
GO
ALTER DATABASE [TrialsDB] SET AUTO_UPDATE_STATISTICS ON
GO
ALTER DATABASE [TrialsDB] SET CURSOR_CLOSE_ON_COMMIT OFF
GO
ALTER DATABASE [TrialsDB] SET CURSOR_DEFAULT GLOBAL
GO
ALTER DATABASE [TrialsDB] SET CONCAT_NULL_YIELDS_NULL OFF
GO
ALTER DATABASE [TrialsDB] SET NUMERIC_ROUNDABORT OFF
GO
ALTER DATABASE [TrialsDB] SET QUOTED_IDENTIFIER OFF
GO
ALTER DATABASE [TrialsDB] SET RECURSIVE_TRIGGERS OFF
GO
ALTER DATABASE [TrialsDB] SET DISABLE_BROKER
GO
ALTER DATABASE [TrialsDB] SET AUTO_UPDATE_STATISTICS_ASYNC OFF
GO
ALTER DATABASE [TrialsDB] SET DATE_CORRELATION_OPTIMIZATION OFF
GO
ALTER DATABASE [TrialsDB] SET TRUSTWORTHY OFF
GO
ALTER DATABASE [TrialsDB] SET ALLOW_SNAPSHOT_ISOLATION OFF
GO
ALTER DATABASE [TrialsDB] SET PARAMETERIZATION SIMPLE
GO
ALTER DATABASE [TrialsDB] SET READ_COMMITTED_SNAPSHOT OFF
GO
ALTER DATABASE [TrialsDB] SET HONOR_BROKER_PRIORITY OFF
GO
ALTER DATABASE [TrialsDB] SET RECOVERY FULL
GO
ALTER DATABASE [TrialsDB] SET MULTI_USER
GO
ALTER DATABASE [TrialsDB] SET PAGE_VERIFY CHECKSUM
GO
ALTER DATABASE [TrialsDB] SET DB_CHAINING OFF
GO
ALTER DATABASE [TrialsDB] SET FILESTREAM( NON_TRANSACTED_ACCESS = OFF )
GO
ALTER DATABASE [TrialsDB] SET TARGET_RECOVERY_TIME = 0 SECONDS
GO
ALTER DATABASE [TrialsDB] SET READ_WRITE
GO
Now we will create a table.
Create table in database
Below is the query to create table in database.
USE [TrialsDB]
GO
/****** Object: Table [dbo].[SalesOrderDetail] Script Date: 25-Feb-16 12:35:45 PM ******/
SET ANSI_NULLS ON
GO
SET QUOTED_IDENTIFIER ON
GO
CREATE TABLE [dbo].[SalesOrderDetail](
[SalesOrderID] [int] NOT NULL,
[SalesOrderDetailID] [int] IDENTITY(1,1) NOT NULL,
[CarrierTrackingNumber] [nvarchar](25) NULL,
[OrderQty] [smallint] NOT NULL,
[ProductID] [int] NOT NULL,
[SpecialOfferID] [int] NOT NULL,
[UnitPrice] [money] NOT NULL,
[UnitPriceDiscount] [money] NOT NULL,
[LineTotal] AS (isnull(([UnitPrice]*((1.0)-[UnitPriceDiscount]))*[OrderQty],(0.0))),
[rowguid] [uniqueidentifier] ROWGUIDCOL NOT NULL,
[ModifiedDate] [datetime] NOT NULL,
CONSTRAINT [PK_SalesOrderDetail_SalesOrderID_SalesOrderDetailID] PRIMARY KEY CLUSTERED
(
[SalesOrderID] ASC,
[SalesOrderDetailID] ASC
)WITH (PAD_INDEX = OFF, STATISTICS_NORECOMPUTE = OFF, IGNORE_DUP_KEY = OFF, ALLOW_ROW_LOCKS = ON, ALLOW_PAGE_LOCKS = ON) ON [PRIMARY]
) ON [PRIMARY]
GO
Can we insert some data to the table now?
Insert data to table
To insert the data, I will attach a database script file along with the download file, you can either run that or insert some data using the following query. By the way if you would like to know how to generate scripts with data in SQL Server, you can check here.
USE [TrialsDB]
GO
INSERT INTO [dbo].[SalesOrderDetail]
([SalesOrderID]
,[CarrierTrackingNumber]
,[OrderQty]
,[ProductID]
,[SpecialOfferID]
,[UnitPrice]
,[UnitPriceDiscount]
,[rowguid]
,[ModifiedDate])
VALUES
(<SalesOrderID, int,>
,<CarrierTrackingNumber, nvarchar(25),>
,<OrderQty, smallint,>
,<ProductID, int,>
,<SpecialOfferID, int,>
,<UnitPrice, money,>
,<UnitPriceDiscount, money,>
,<rowguid, uniqueidentifier,>
,<ModifiedDate, datetime,>)
GO
Along with this, we can create a new stored procedure which will fetch the data. The following is the query to create the stored procedure.
USE [TrialsDB]
GO
/****** Object: StoredProcedure [dbo].[usp_Get_SalesOrderDetailPage] Script Date: 25-Feb-16 12:53:07 PM ******/
SET ANSI_NULLS ON
GO
SET QUOTED_IDENTIFIER ON
GO
-- =============================================
-- Author: <Author,Sibeesh Venu>
-- Create date: <Create Date, 18-Feb-2016>
-- Description: <Description,To fetch SalesOrderDetail Page Wise>
-- =============================================
ALTER PROCEDURE [dbo].[usp_Get_SalesOrderDetailPage] @pageOffset int=0 AS BEGIN -- SET NOCOUNT ON added to prevent extra result sets from
-- interfering with SELECT statements.
SET NOCOUNT ON;
WITH CTE_Sales(SlNo, SalesOrderID,SalesOrderDetailID,CarrierTrackingNumber,OrderQty,ProductID,UnitPrice,ModifiedDate) AS
( SELECT ROW_NUMBER() over (
ORDER BY ModifiedDate DESC) AS SlNo,
SalesOrderID,
SalesOrderDetailID,
CarrierTrackingNumber,
OrderQty,
ProductID,
UnitPrice,
ModifiedDate
FROM dbo.SalesOrderDetail)
SELECT *
FROM CTE_Sales
WHERE SlNo>=@pageOffset
AND SlNo<@pageOffset+10 END
--[usp_Get_SalesOrderDetailPage] 4
Here we are using Common Table Expressions in SQL Server. If you are new to CTE, you can always visit"Common Table Expression Example" for some more information regarding that. It seems the database is ready with the data now. Then we can go back to our view. We will change our view as follows with the custom styles.
@{
ViewBag.Title = "Index";
}
<h2>Index</h2>
<link href="~/Content/angular-material.css" rel="stylesheet" />
<style>
.virtualRepeatdemoDeferredLoading #vertical-container {
padding: 10px;
border: 1px solid #ccc;
border-radius: 5px;
box-shadow: 1px 10px 10px 1px #ccc;
background-color: #fff;
width: 40%;
height: 390px;
margin: 20px;
}
.virtualRepeatdemoDeferredLoading .repeated-item {
border-bottom: 1px solid #ddd;
box-sizing: border-box;
height: 40px;
padding: 10px;
border: 1px solid #ccc;
border-radius: 5px;
box-shadow: 1px 10px 10px 1px #ccc;
background-color: #fff;
width: 90%;
height: 120px;
margin: 20px;
color: #aaa;
font-size: 12px;
line-height: 20px;
}
.virtualRepeatdemoDeferredLoading md-content {
margin: 16px;
}
.virtualRepeatdemoDeferredLoading md-virtual-repeat-container {
border: solid 1px grey;
}
.virtualRepeatdemoDeferredLoading .md-virtual-repeat-container .md-virtual-repeat-offsetter div {
padding-left: 16px;
}
#introduction {
border-bottom: 1px solid #ddd;
box-sizing: border-box;
height: 40px;
padding: 10px;
border: 1px solid #ccc;
border-radius: 5px;
box-shadow: 1px 10px 10px 1px #ccc;
background-color: #fff;
width: 98%;
height: 70px;
color: #aaa;
font-size: 12px;
line-height: 25px;
}
</style>
<div ng-controller="AppCtrl as ctrl" ng-cloak="" class="virtualRepeatdemoDeferredLoading" ng-app="MyApp">
<md-content layout="column">
<div id="introduction">
<p>
Please scroll the Grid to load the data from database. This is a simple demo of deffered or virtual data loading in Angular JS.
We created this application MVC with Web API to fetch the data. I hope you enjoyed the demo. Please visit again <img src="http://sibeeshpassion.com/wp-includes/images/smilies/simple-smile.png" alt=":)" class="wp-smiley" style="height: 1em; max-height: 1em;">
</p>
</div>
<md-virtual-repeat-container id="vertical-container">
<div md-virtual-repeat="item in ctrl.dynamicItems" md-on-demand="" class="repeated-item" flex="">
<div> <b>SlNo:</b> {{item.SlNo}}, <b>SalesOrderID:</b> {{item.SalesOrderID}}</div>
<div> <b>SalesOrderDetailID:</b> {{item.SalesOrderDetailID}}, <b>CarrierTrackingNumber:</b> {{item.CarrierTrackingNumber}}</div>
<div> <b>OrderQty:</b> {{item.OrderQty}}, <b>ProductID:</b> {{item.ProductID}}</div>
<div> <b>UnitPrice:</b> {{item.UnitPrice}}</div>
</div>
</md-virtual-repeat-container>
</md-content>
</div>
<script src="~/scripts/angular.min.js"></script>
<script src="~/scripts/angular-route.min.js"></script>
<script src="~/scripts/angular-aria.min.js"></script>
<script src="~/scripts/angular-animate.min.js"></script>
<script src="~/scripts/angular-messages.min.js"></script>
<script src="~/scripts/angular-material.js"></script>
<script src="~/scripts/svg-assets-cache.js"></script>
<script src="~/scripts/Default/Default.js"></script>
As you can see from the above code, our AngularJS controller is ng-controller=”AppCtrl as ctrl” and the AngularJS app is ng-app=”MyApp”. We use md-virtual-repeat as a repeater control, so that it can be used to loop through the object item in ctrl.dynamicItems. Now it is time to create our AngularJS scripts. Shall we?
We can create our Angular App and Controller as follows.
(function () {
'use strict';
angular
.module('MyApp', ['ngMaterial', 'ngMessages', 'material.svgAssetsCache'])
.controller('AppCtrl', function ($http, $timeout) {
});
})();
Now in the controller we will add a function with some predefined items as follows.
var DynamicItems = function () {
this.loadedPages = {};
this.numItems = 0;
this.PAGE_SIZE = 10;
this.fetchNumItems_();
};
Here loadedPages is the data collection which is keyed by the page number (Our parameter id in the controller). And numItems is the total number of items. PAGE_SIZE is the number of items to be fetched from each requests.
Now we will create a function to calculate the length of the records.
DynamicItems.prototype.getLength = function () {
return this.numItems;
};
This numItems can be set in the below function.
DynamicItems.prototype.fetchNumItems_ = function () {
$timeout(angular.noop, 300).then(angular.bind(this, function () {
this.numItems = 1000;
}));
};
Here we are setting the numItems as 1000 for demo purposes, you can always get the count from database and assign it here with a $http request as we load the data from database here, you are yet to see that, no worries.
Below is the function to get the item by index.
DynamicItems.prototype.getItemAtIndex = function (index) {
var pageNumber = Math.floor(index / this.PAGE_SIZE);
var page = this.loadedPages[pageNumber];
if (page)
{
return page[index % this.PAGE_SIZE];
} else if (page !== null)
{
this.fetchPage_(pageNumber);
}
};
Here is the main part to load the data from database using a $http service in AngularJS.
DynamicItems.prototype.fetchPage_ = function (pageNumber) {
this.loadedPages[pageNumber] = null;
$timeout(angular.noop, 300).then(angular.bind(this, function () {
var thisObj = this;
this.loadedPages[pageNumber] = [];
var pageOffset = pageNumber * this.PAGE_SIZE;
var myData;
var url = '';
url = 'api/DataAPI/' + pageOffset;
$http({
method: 'GET',
url: url,
}).then(function successCallback(response) {
// this callback will be called asynchronously
// when the response is available
myData = JSON.parse(response.data);
pushLoadPages(thisObj, myData)
}, function errorCallback(response) {
console.log('Oops! Something went wrong while fetching the data. Status Code: ' + response.status + ' Status statusText: ' + response.statusText);
// called asynchronously if an error occurs
// or server returns response with an error status.
});
}));
};
As you can see call to our Web API ( url = ‘api/DataAPI/’ + pageOffset;) from $http service, the callback functionSuccessCallback will get the data from database as a response. Once we get the response, we will pass the data to a function pushLoadPages to push the data items to the loadedPages. Cool right? Below is the code snippets for that function.
function pushLoadPages(thisObj, servData)
{
if (servData != undefined)
{
for (var i = 0; i < servData.length; i++)
{
thisObj.loadedPages[pageNumber].push(servData[i]);
}
}
}
Here is the complete code for our AngularJS.
AngularJS Complete Code
(function () {
'use strict';
angular
.module('MyApp', ['ngMaterial', 'ngMessages', 'material.svgAssetsCache'])
.controller('AppCtrl', function ($http, $timeout) {
var DynamicItems = function () {
this.loadedPages = {};
this.numItems = 0;
this.PAGE_SIZE = 10;
this.fetchNumItems_();
};
DynamicItems.prototype.getItemAtIndex = function (index) {
var pageNumber = Math.floor(index / this.PAGE_SIZE);
var page = this.loadedPages[pageNumber];
if (page) {
return page[index % this.PAGE_SIZE];
} else if (page !== null) {
this.fetchPage_(pageNumber);
}
};
DynamicItems.prototype.getLength = function () {
return this.numItems;
};
DynamicItems.prototype.fetchPage_ = function (pageNumber) {
this.loadedPages[pageNumber] = null;
$timeout(angular.noop, 300).then(angular.bind(this, function () {
var thisObj = this;
this.loadedPages[pageNumber] = [];
var pageOffset = pageNumber * this.PAGE_SIZE;
var myData;
var url = '';
url = 'api/DataAPI/' + pageOffset;
$http({
method: 'GET',
url: url,
}).then(function successCallback(response) {
// this callback will be called asynchronously
// when the response is available
myData = JSON.parse(response.data);
pushLoadPages(thisObj, myData)
}, function errorCallback(response) {
console.log('Oops! Something went wrong while fetching the data. Status Code: ' + response.status + ' Status statusText: ' + response.statusText);
// called asynchronously if an error occurs
// or server returns response with an error status.
});
function pushLoadPages(thisObj, servData) {
if (servData != undefined) {
for (var i = 0; i < servData.length; i++) {
thisObj.loadedPages[pageNumber].push(servData[i]);
}
}
}
}));
};
DynamicItems.prototype.fetchNumItems_ = function () {
$timeout(angular.noop, 300).then(angular.bind(this, function () {
this.numItems = 1000;
}));
};
this.dynamicItems = new DynamicItems();
});
})();