The Angular team has been primarily focused on the removal of the Angular Framework legacy code block and rendering pipeline in recent releases. These actions are primarily carried out with the goal of improving performance. As part of this endeavor, the Angular team developed a new idea of defining the component, Standalone Component, in Angular 14. We can easily develop any application without using the NgModel with the aid of this idea. This technique allows developers to complete Angular application development considerably faster, and most significantly, they do not need to grasp or consider the concept of NgModule within the application at all.

As a result, in this article, we will go through the concept of a Standalone Component in any angular application.
An Overview of Standalone Component
From Angular 14 onwards, the angular team introduced the concept of the Standalone component. The standalone component is nothing but a simple component that will not be a part of any Angular module. Before Angular 14, whenever we define any component in the Angular application, we need to first declare that component within the Angular module declaration array objects. If we forgot to do that task, then the Angular compiler throws the error. But, from Angular 14 onwards, these steps are not mandatory. Because, now, we can create any component which can not be a part of any component. And that’s why it is called a Standalone component. Just like standalone components, we can also create pipes and directives as well as Standalone. This type of standalone component can be used anywhere in the application like -
- Within any module-based component
- Within any other Standalone component as a child component
- Within route
- Can use as a lady-loading component.
In Angular 14, this standalone component concept is released as a part of the developer preview. Now, in the latest version of Angular, i.e. Angular 16, we can use the Standalone Component in full swing with full work support for everything like HttpClient, Router, Angular Element, and many more.
Benefits of using a Standalone Component
As a developer, when we plan to start development work for any Angular-based application now, then we first need to decide whether we will use the legacy NgModule-based application or we will need to use the Standalone component-based architecture. So, before making this decision, we first need to understand the benefits of using a Standalone component. Some of the key benefits which we can achieve by using standalone components are as follows -
- One of the major reasons for the Standalone component is Reusability. We can use this type of component throughout the application event in different applications. In this way, we can save development time and can reduce the chances of code duplication.
- As the Standalone component is independent and does not dependent on any modules, so, we can perform unit testing of this component very easily.
- In the Standalone component, we can perform encapsulation in the concept of the component’s styles and templates. It reduces interference with different components and helps us to maintain a clean codebase.
- The concept of the Standalone component encourages us to follow modular development. We can break the large application into smaller and manageable modules and can develop those parts then.
- Another reason for using a standalone component is the isolated state of the component. It means every standalone component can maintain its state, which is isolated from the other parts of the application.
Create An Angular Application as a Standalone
Now, in this section, we will discuss how we can create an Angular application as a Standalone component based on using the Angular CLI command. So, when we want to create any angular application as a Standalone, then we just need to add the --standalone prefix at the end of the Angular CLI command. Same logic we can use also while we create the Standalone component, directives, or pipes.
ng new angular-standalone-component-demo --standalone
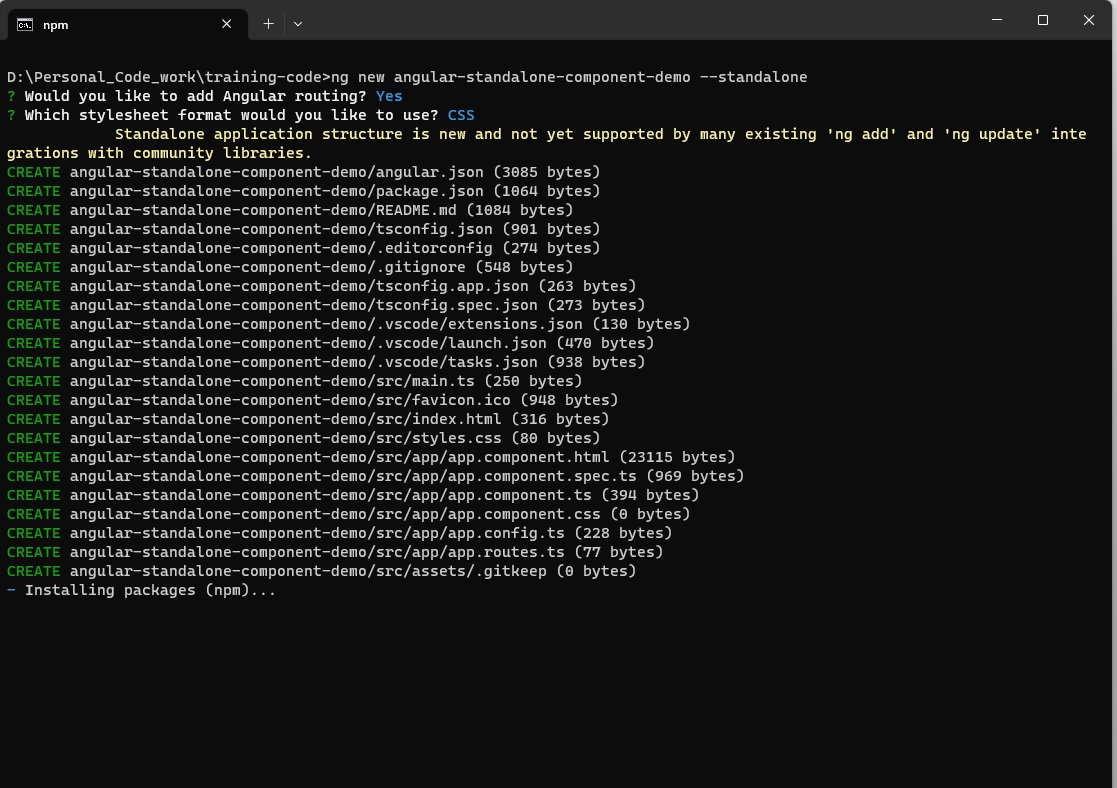
Once the application is created, then it will create the project structure as below.
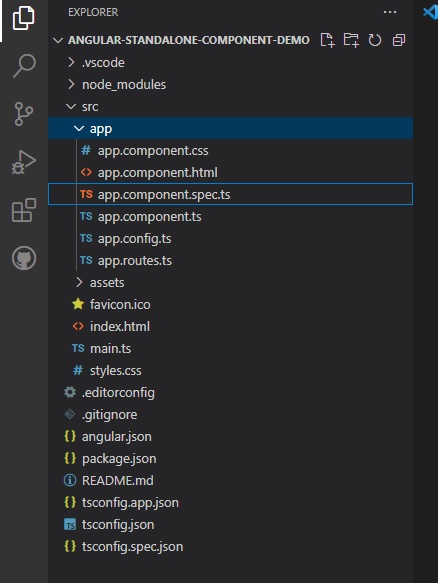
If we notice, we can find that in the create application structure, there is no app.module.ts file. It is because we already created this application as a standalone application. Now, if we open the app.component.ts file, we can find out the below code -
import { Component } from '@angular/core';
import { CommonModule } from '@angular/common';
import { RouterOutlet } from '@angular/router';
@Component({
selector: 'app-root',
standalone: true,
imports: [CommonModule, RouterOutlet],
templateUrl: './app.component.html',
styleUrls: ['./app.component.css']
})
export class AppComponent {
title = 'angular-standalone-component-demo';
}
In the above example, we can see that standalone attribute under the @Component metadata, which indicates that this component will act as a standalone component. As it is a standalone component, so, we don’t have any NgModule for bootstrapping the component. Now, in the case of a Standalone application, one Standalone component will be treated as a root component and that component we need to bootstrap within the main.ts file as below -
import { bootstrapApplication } from '@angular/platform-browser';
import { appConfig } from './app/app.config';
import { AppComponent } from './app/app.component';
bootstrapApplication(AppComponent, appConfig)
.catch((err) => console. Error(err));
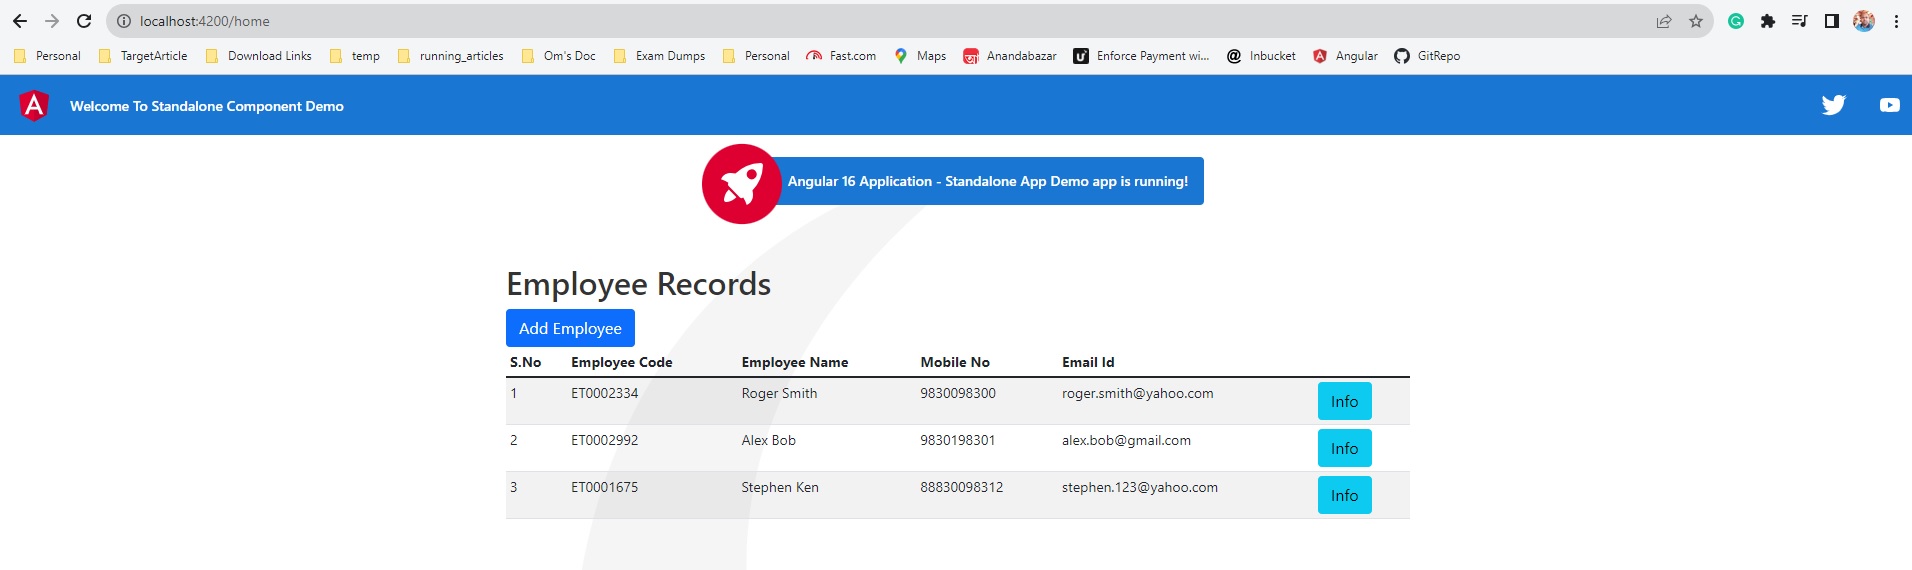
Create and Use a Standalone Component
Now, we have already created the Angular Standalone component-based application. In this demonstration, we will create one basic employee list which will display the employee list and also, and we can add the employee data to that list. For this purpose, we first create an employee list component that will display the list of employees. In this demo, whatever component we will create, all components will be a standalone components. Once we will create that component, the output will be as below